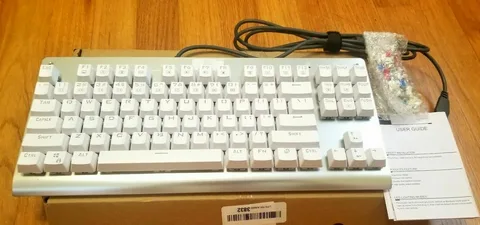
Custom mechanical keyboards have exploded in popularity in recent years, and for good reason. Not only do they provide a unique typing experience, but they also allow you to express your creativity through design, layout, and function. If you’re interested in creating a tenkeyless keyboard that balances functionality with compactness, this guide will walk you through how to build your own custom 87 keyboard from scratch.
What is an 87-Key Keyboard?
An 87-key keyboard, often called a TKL (tenkeyless), is a mechanical keyboard layout that excludes the number pad, resulting in a smaller footprint without sacrificing essential keys. It’s a favorite among gamers, writers, and programmers for its ergonomic and space-saving benefits.
Tools and Materials You’ll Need
Before learning how to build your own custom 87 keyboard from scratch, gather the following components and tools:
Essential Components:
- PCB (Printed Circuit Board) – The heart of the keyboard
- Case – Aluminum, plastic, or acrylic depending on your preference
- Plate – Supports the switches and affects the typing feel
- Switches – Choose between tactile, linear, or clicky
- Keycaps – ABS or PBT materials in various profiles
- Stabilizers – For larger keys like spacebar, enter, and shift
- USB Cable – Detachable or built-in
- Microcontroller – If building a custom PCB
Tools Required:
- Soldering iron and solder
- Switch puller and keycap puller
- Screwdriver set
- Tweezers
- Lubricant (optional, for smoother switch feel)
- Desoldering pump (for mistakes or changes)
Step-by-Step Guide
1. Plan Your Build
Start by selecting your keyboard layout, aesthetics, and components. Websites like Keyboard Layout Editor and KLE-JSON can help visualize your layout. Many custom keyboard stores offer kits that include most of the essentials.
2. Install Stabilizers
Before installing switches, clip, lube, and insert the stabilizers into your PCB. These ensure smooth movement for larger keys.
3. Mount Switches to the Plate and PCB
Snap each switch into the metal plate, aligning the pins with the PCB. Ensure all switches are secure and properly placed before soldering.
4. Solder the Switches
Use a soldering iron to attach the switch pins to the PCB. Take your time—soldering can make or break your build. A steady hand and proper ventilation are crucial here.
5. Assemble the Case
Once your PCB is populated and all switches are soldered, mount it into the case using screws or snap-fit methods, depending on your case design.
6. Add Keycaps
Place your selected keycaps on the switches. Be careful not to damage the stems. Now your keyboard is starting to take shape.
7. Flash Firmware (if needed)
If you’re using a custom or hot-swappable PCB, you might need to flash firmware using tools like QMK or VIA. This allows you to configure layers, macros, and lighting.
Testing and Troubleshooting
Before regular use, test every key using an online keyboard tester. If a key doesn’t work, check your solder joints or switch alignment.
Customize and Enjoy!
Once everything works perfectly, you can personalize even further by adding RGB lighting, artisan keycaps, or custom cable sleeves.
Final Thoughts
Learning how to build your own custom 87 keyboard from scratch is both a technical and creative journey. It gives you a deeper understanding of how keyboards work and allows for complete personalization of your typing experience.
Whether you’re doing it for the aesthetics, performance, or just the fun of building, the satisfaction of typing on something you made yourself is unmatched. So, gather your tools, pick your parts, and start building—because there’s nothing quite like using a keyboard you crafted with your own hands.

